
Classes- Alabama
- Alaska
- Arizona
- Arkansas
- California
- Colorado
- Connecticut
- Delaware
- Florida
- Georgia
- Hawaii
- Idaho
- Illinois
- Indiana
- Iowa
- Kansas
- Kentucky
- Louisiana
- Maine
- Maryland
- Massachusetts
- Michigan
- Minnesota
- Mississippi
- Missouri
- Montana
- Nebraska
- Nevada
- New Hampshire
- New Jersey
- New Mexico
- New York
- North Carolina
- North Dakota
- Ohio
- Oklahoma
- Oregon
- Pennsylvania
- Rhode Island
- Tennessee
- Texas
- Utah
- Vermont
- Virginia
- Washington
- West Virginia
- Wisconsin
- Wyoming
Bezel Setting With Mary
Bezel Setting a Pendant
Bezel Setting with Mary Gohman
|
|
|
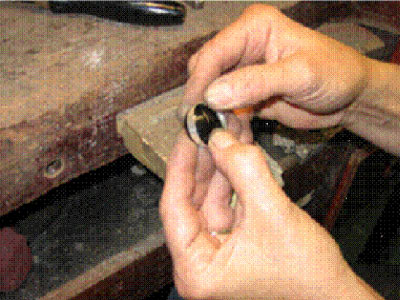
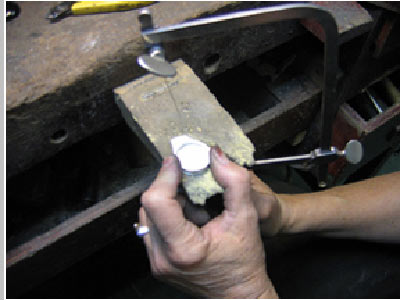
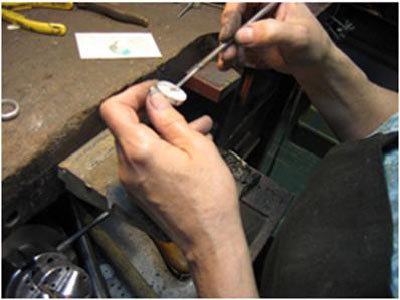
| 1. Wrap fine silver bezel wire around the stone. The bezel wire is higher then the curve of the stone, so you can push the bezel wire to secure the stone. Use .99 fine silver bezel wire as it is softer and more pliable
|
|
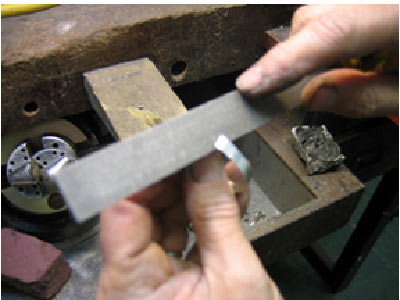
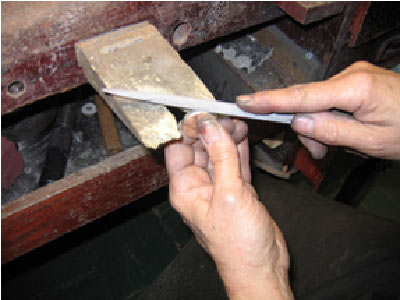
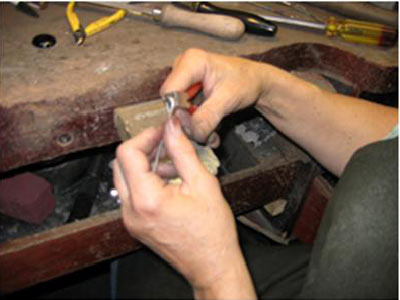
| 2. Cut the wire with a flush cutter. Check the joint for gaps by holding the bezel up to the light. File to flatten ends with the biggest file you can handle. Shape doesn t matter at this point. What matters is a good seam
|
|
|
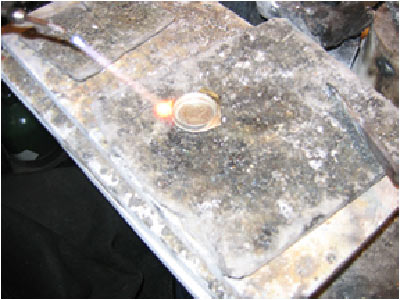
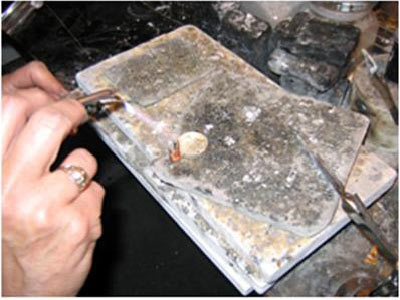
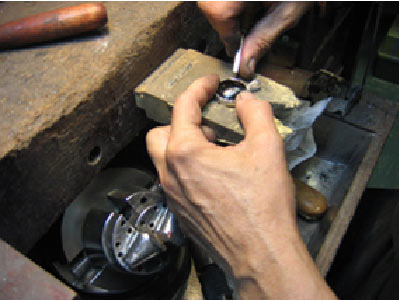
3. Solder the seam with medium solder. First, coat the bezel with flux. The flux protects metal from oxidation and facilitates the flow of solder. Second, Heat the whole bezel before soldering, not just the area of the seam. This process also anneals the silver and makes it more pliable. Third, solder the seam. 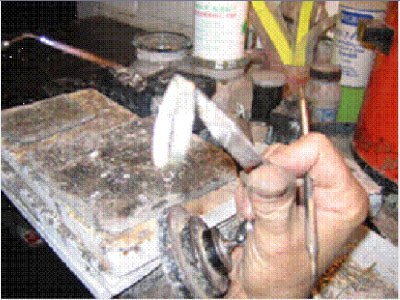
|
|
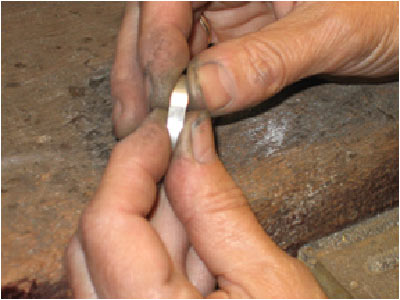
| 4. File off excess solder.
|
|
|
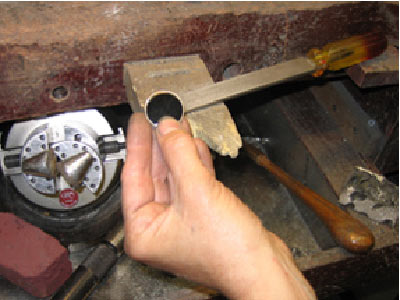
5. Check the fit.
|
|
|
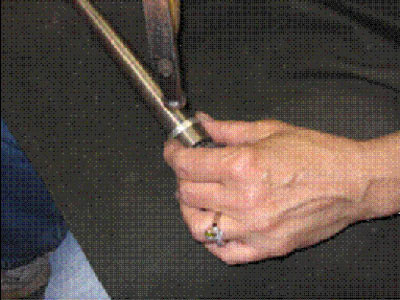
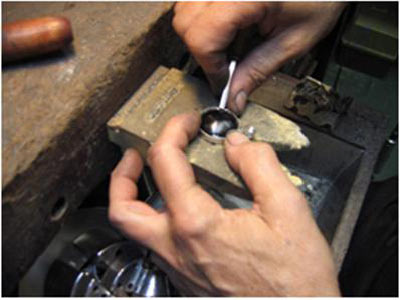
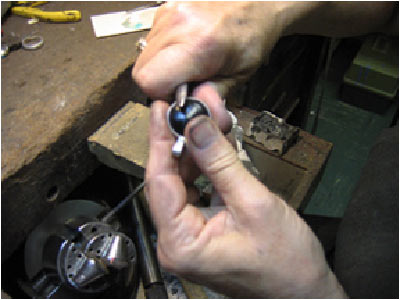
6. Put the bezel on a mandrel and with a wooden hammer tap to make it round and this will also harden the metal. If it is too small use a metal hammer with the mandrel to stretch it, if it is too large-cut out a section and repeat the soldering.
|
|
| 7. Check the fit of the stone in the bezel.
|
|
|
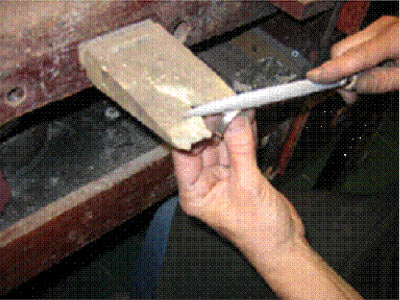
8. File the back of the bezel. If you are using a nontransparent stone file with the stone in place. This will ensure the bezel keeps its shape.
|
|
|
9. Cut a piece of silver for the back that is larger then the stone.
|
|
|
10. Clean with sand paper to remove finger prints and dirt.
|
|
|
11. Solder together using medium solder. Heat the whole backing sheet not just the area of the seam as silver conducts heat quickly. Keep flame away from top of bezel wire so you don t melt it. Pickle .
|
|
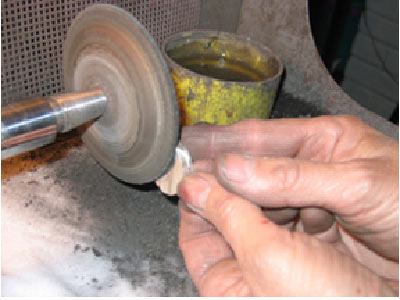
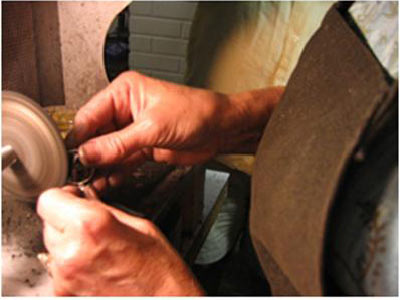
| 12. Trim off excess silver sheet. File, sand and polish to smooth. Ultra sonic or clean with soap and water
|
|
|
13. Sand, file or polish off fire scale. Fire scale is caused by the copper in sterling that comes to the surface during soldering and looks like darker areas on the metal.
|
|
|
14. To make the bail. Bend wire into loop with round nose pliers. Using a half round file, file the bail to fit the curve of the pendant. Polish the bail. Clean to remove all polishing compound
|
|
|
15. Solder on the bail. Hold in place with push pin and use easy solder so you don t loosen previous soldered seams. Use the same steps as soldering the seam
|
|
|
16. Repolish to remove all firescale. Clean.
|
|
|
17. Put the cab into the bezel and check the fit. If you are using a nontransparent stone you can epoxy the stone to the bezel to keep it in place.
|
|
|
18. Using a prong pusher lock the stone into place by pushing the walls of the silver bezel around the stone. The first four bends are evenly spaced around the bezel-using the face of a clock-push at 12 then 6 then 3 then 9 o clock. Then go around the stone little by little.
|
|
|
19. Smooth the bezel with a burnisher and repolish.
|
|
|
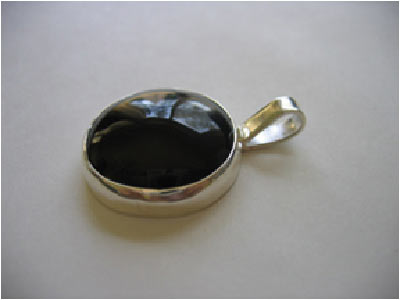
20. Finished Pendant
|
|
 Profile:
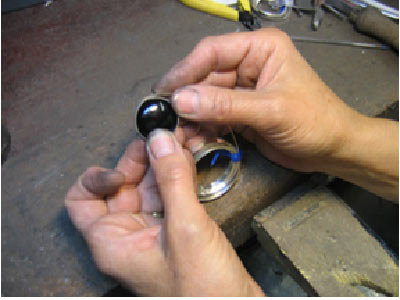

- Birth Stone Gems
- Wedding & Anniversary Gems
- How To Guides
- Fireable Gems
- Nonprofits and Guilds
- Gem Show
- Gem Stone Information
- ·Abalone
- ·Achroite (Tourmaline)
- ·Agate ( Chalcedony)
- ·Alexandrite
- ·Almandine ( Garnet )
- ·Amber
- ·Amethyst ( Quartz)
- ·Ammolite
- ·Andalusite
- ·Andradite Garnet
- ·Apatite
- ·Aquamarine ( Beryl )
- ·Aventurine ( Quartz )
- ·Azurite
- ·Benitoite
- ·Bloodstone ( Chalcedony )
- ·Brown Quartz ( Smokey Quartz )
- ·Calcite
- ·Carnelian ( Chalcedony )
- ·Cassiterite
- ·Celestine
- ·Cerussite
- ·Chalcedony
- ·Chatoyant Quartz
- ·Chrysoberyl
- ·Chrysocolla
- ·Chrysoprase (Chalcedony)
- ·Citrine ( Quartz )
- ·Coral
- ·Danburite
- ·Diamond
- ·Diopside
- ·Dioptase
- ·Dravite ( Tourmaline)
- ·Emerald ( Beryl )
- ·Enstatite
- ·Epidote
- ·Euclase
- ·Fire Agate (Chalcedony)
- ·Fluorite
- ·Gold
- ·Goshenite (Beryl)
- ·Grossular Garnet (Tsavorite Garnet)
- ·Gypsum
- ·Heliodor ( Beryl )
- ·Hematite
- ·Hessonite (Grossular Garnet)
- ·Imperial Topaz
- ·Indicolite ( Tourmaline)
- ·Iolite
- ·Ivory
- ·Jadeite
- ·Jasper (Chalcedony)
- ·Jet
- ·Kornerupine
- ·Kunzite
- ·Kyanite
- ·Labradorite
- ·Lapis Lazuli ( Lazurite)
- ·Lazulite
- ·Malachite
- ·Meerschaum
- ·Microcline
- ·Milky Quartz
- ·Moonstone
- ·Morganite ( Beryl)
- ·Nephrite ( Jade)
- ·Obsidian
- ·Oligoclase
- ·Onyx
- ·Opal
- ·Orthoclase
- ·Padparasha ( Corundum)
- ·Pearl
- ·Peridot
- ·Pink Topaz ( Mercury Myst Vapor )
- ·Plasma ( Chalcedony)
- ·Prase ( Chalcedony )
- ·Prehnite
- ·Pyrite
- ·Pyrope ( Garnet )
- ·Rock Crystal ( Quartz )
- ·Rubellite ( Tourmaline)
- ·Ruby ( Corundum)
- ·Sapphire ( Corundum)
- ·Sardonyx ( Chalcedony)
- ·Scapolite
- ·Schorl (Tourmaline)
- ·Shell
- ·Spessarite (Garnet)
- ·Sphalerite
- ·Spinel
- ·Spodumene (Hiddenite - Triphane)
- ·Tanzanite (Zoisite)
- ·Tektites ( Moldavite )
- ·Tiger Eye
- ·Titanite (Sphene)
- ·Topaz
- ·Turquoise
- ·YAG (Garnet)
- ·Zircon